Please note this is work in progress, that we plan on updating for material specific tuning using KISSlicer.
There are a few prerequisites before getting into material specific tuning.
- Your Extruder is dialed in.
For example, if you request 100 mm at 1 mm/s, you actually extrude 100 mm.
- Your printer is dialed in for XYZ.
i.e. If you were to print a 50 mm cube, the print can be verified by X = 50 mm, Y = 50 mm, and Z = 50 mm.
As an additional resource, Rigid Ink created this fantastic troubleshooting guide.
Now getting into Material Specific Tuning
We will be using this file for tuning.
Step 1: Setting Appropriate Flow Rates
Import this stl to KISSlicer.
On the top toolbar, click on Tuning, then Tuning Wizard.
On the popup dialog box click on the dropdown menu and set it to Flow Rate Tuning. Upon doing so, KISS will turn into this yellow color noting you're in tuning mode.
In the Lower and Upper Limits set in desired volumetric limits.
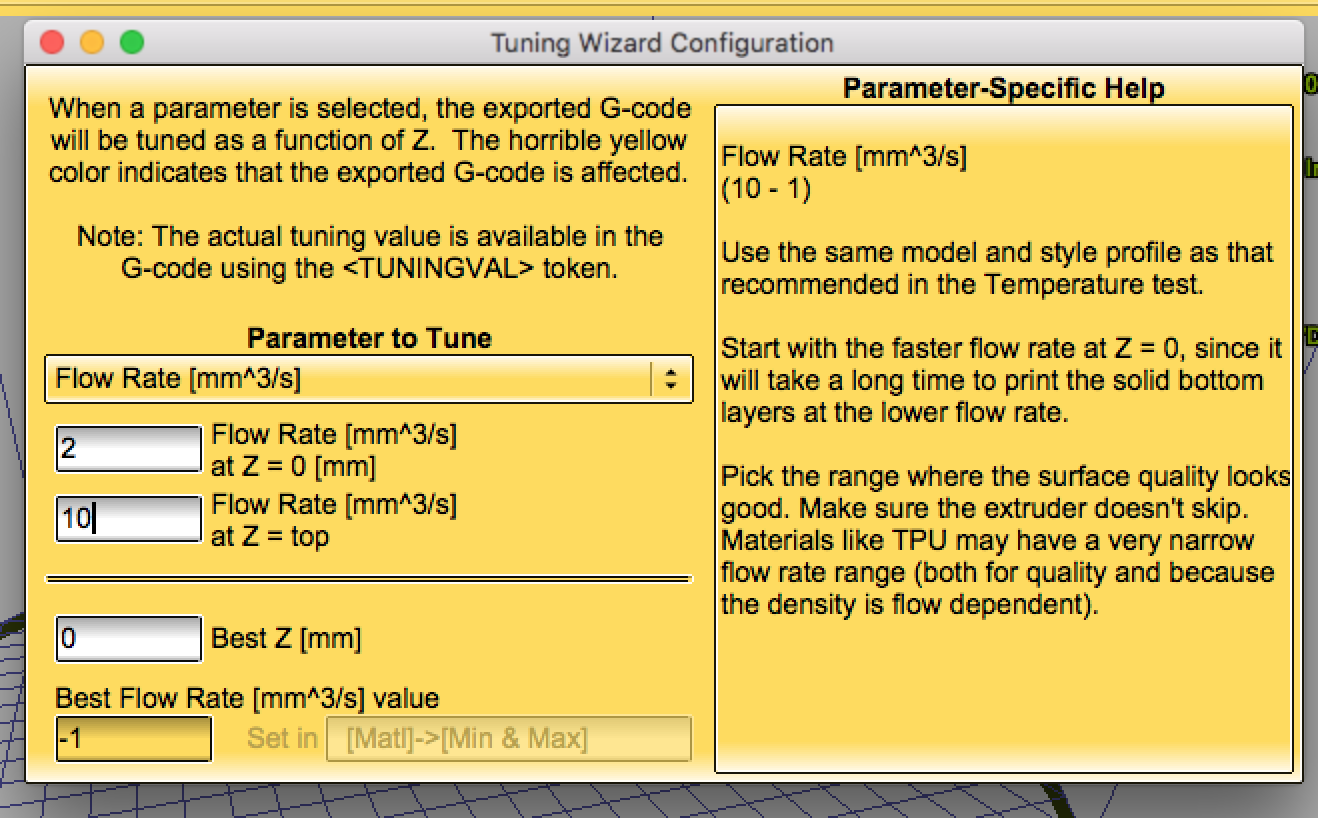
If you're using a E3D V6 hotend, typically put in 2 mm^3 to 10 mm^3.
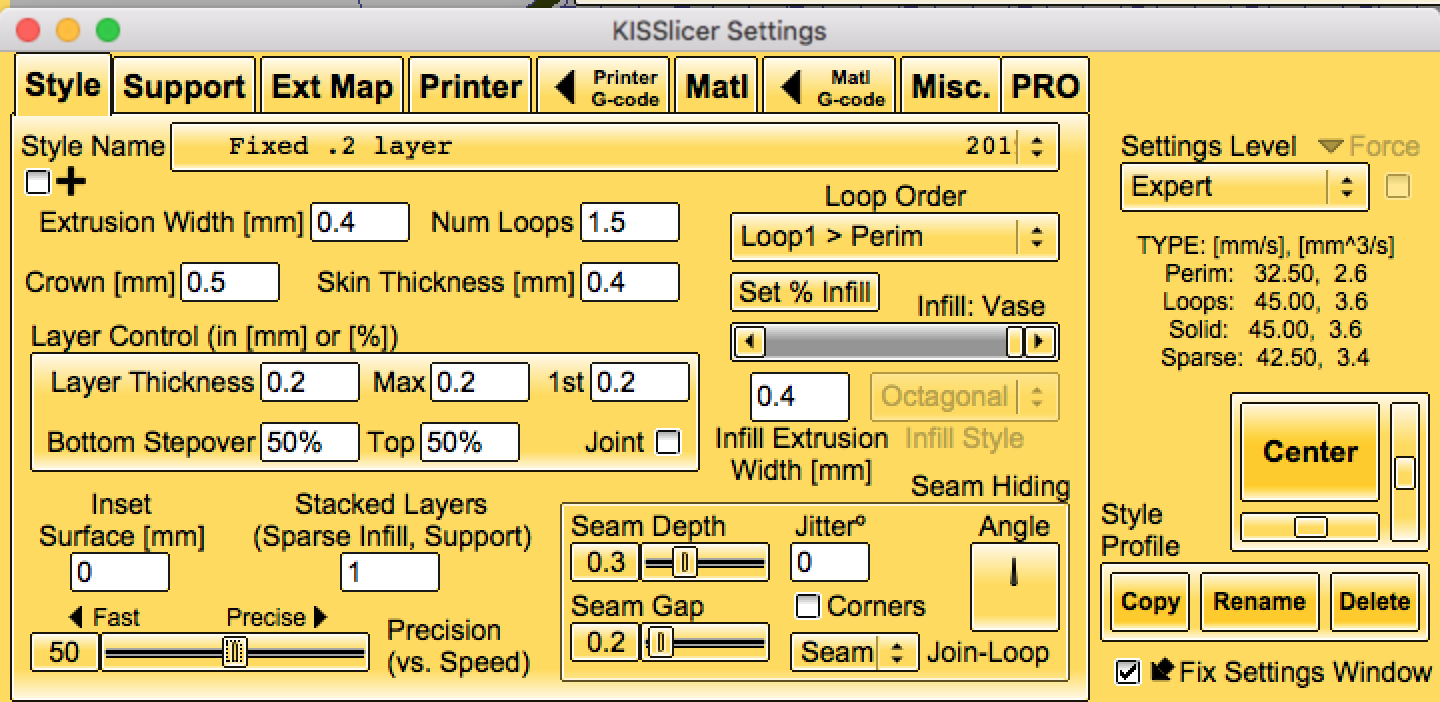
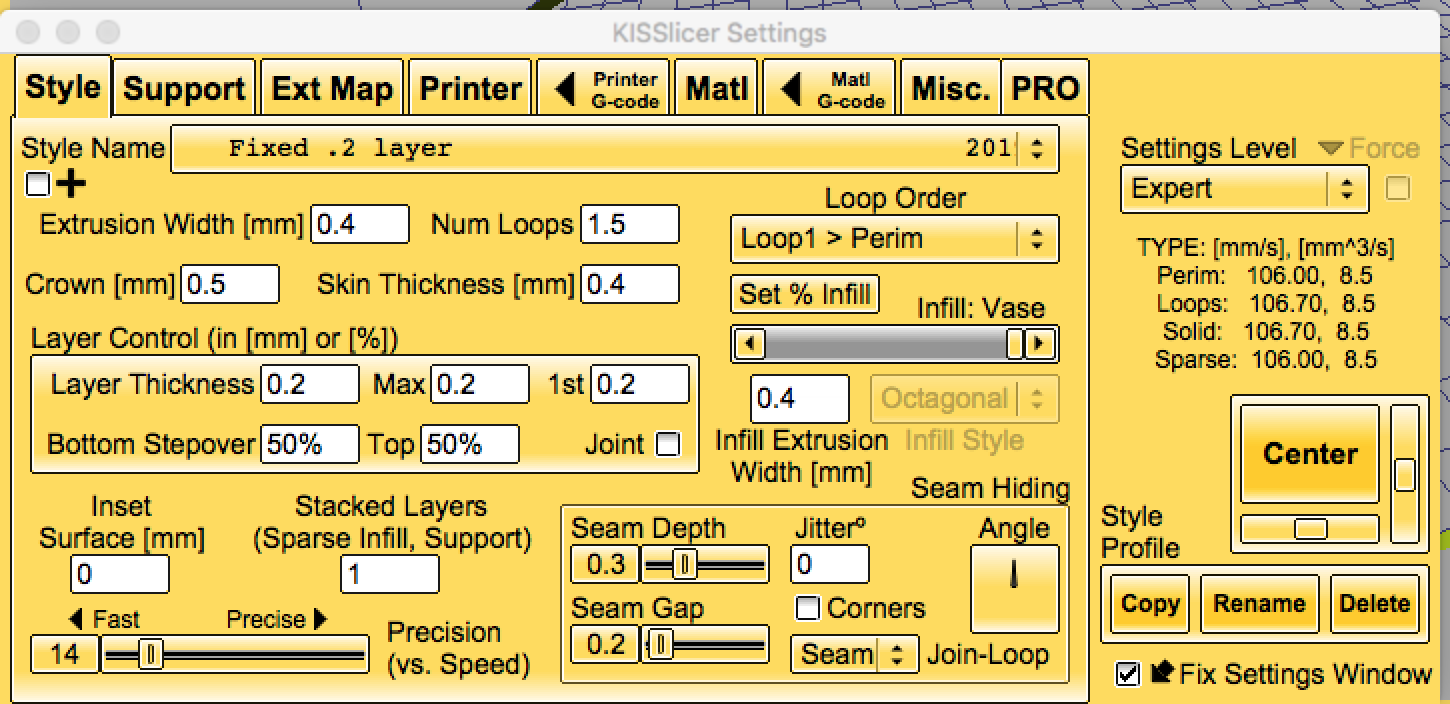
For printing parameters use this for the style tab:
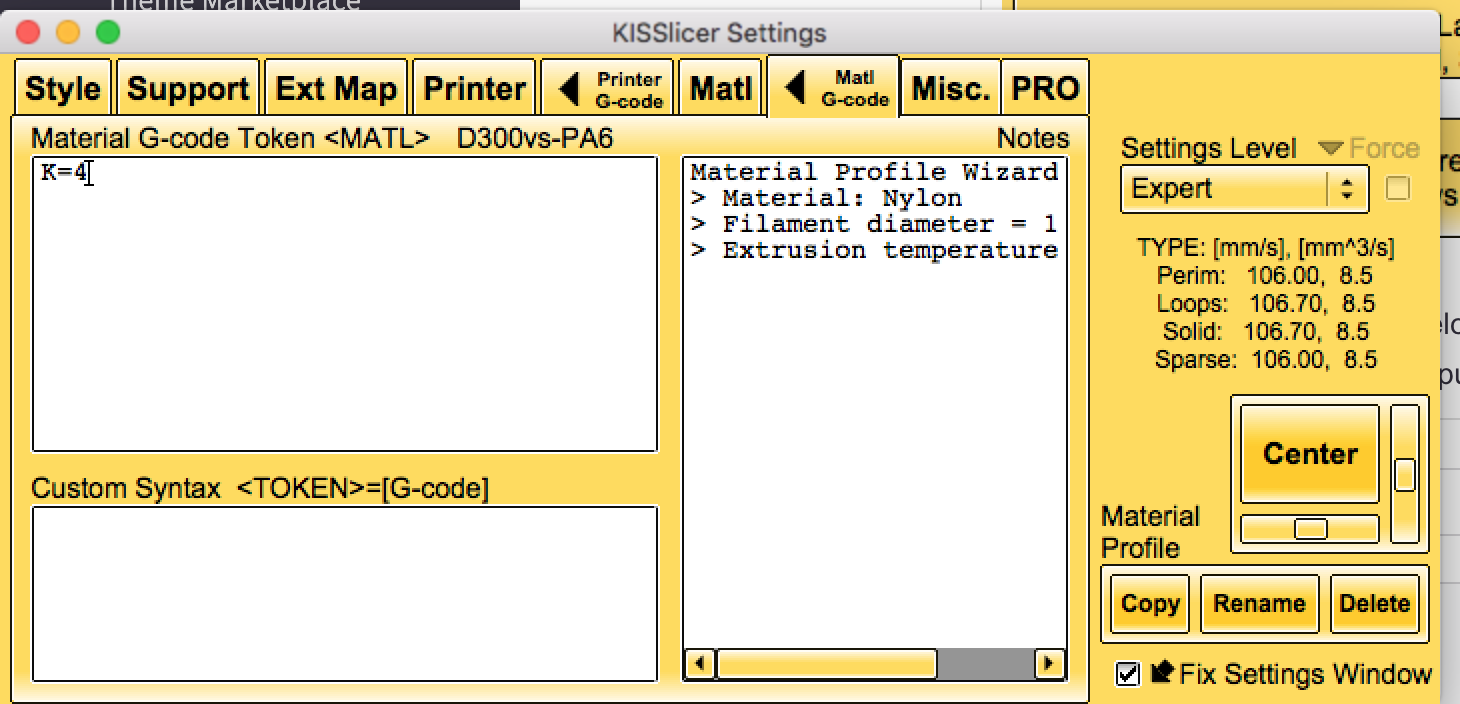
Use this for the Material Tab:
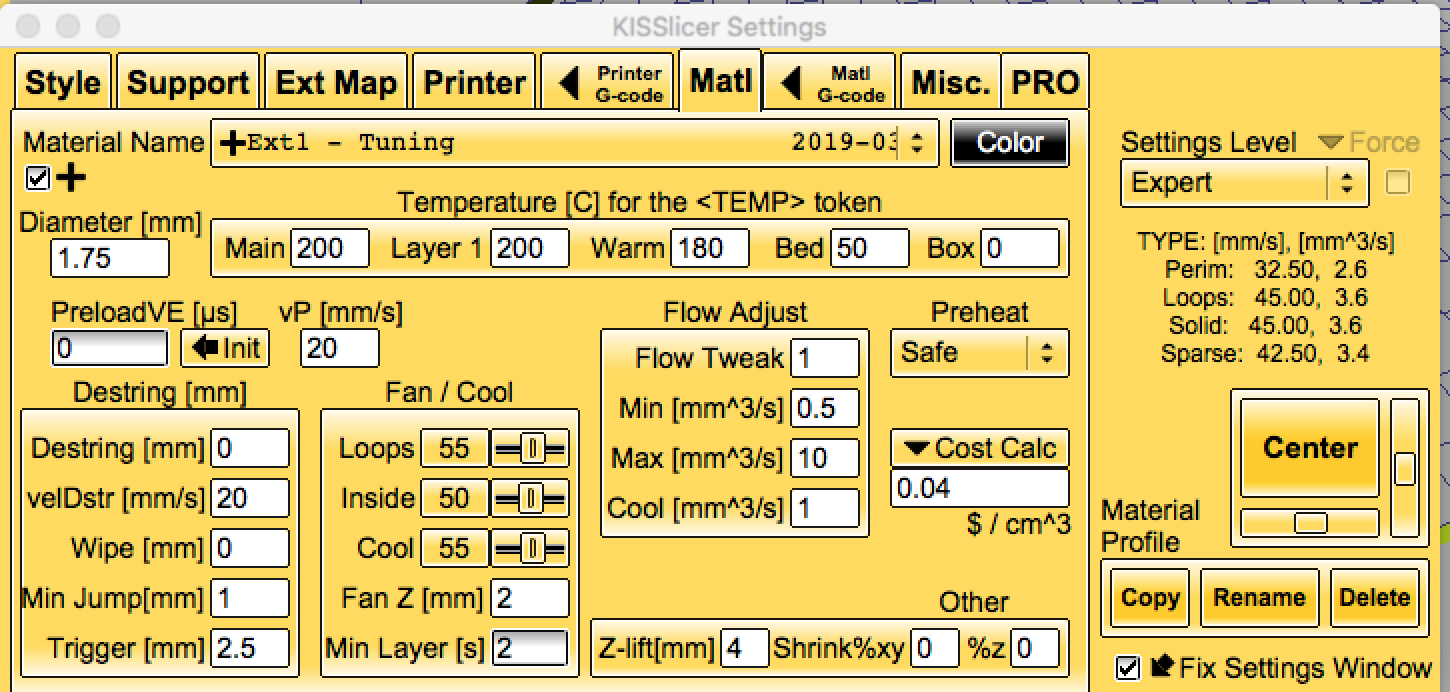
Please note the following:
- We have disable retraction or what KISS calls it, Destring.
- The Z-Lift value will be .5 if you are using a cartesian type printer.
- Set your fans appropriately.
Hit slice and print.
Once the print is complete rotate the cube around and note where the layers look good.
As an example:
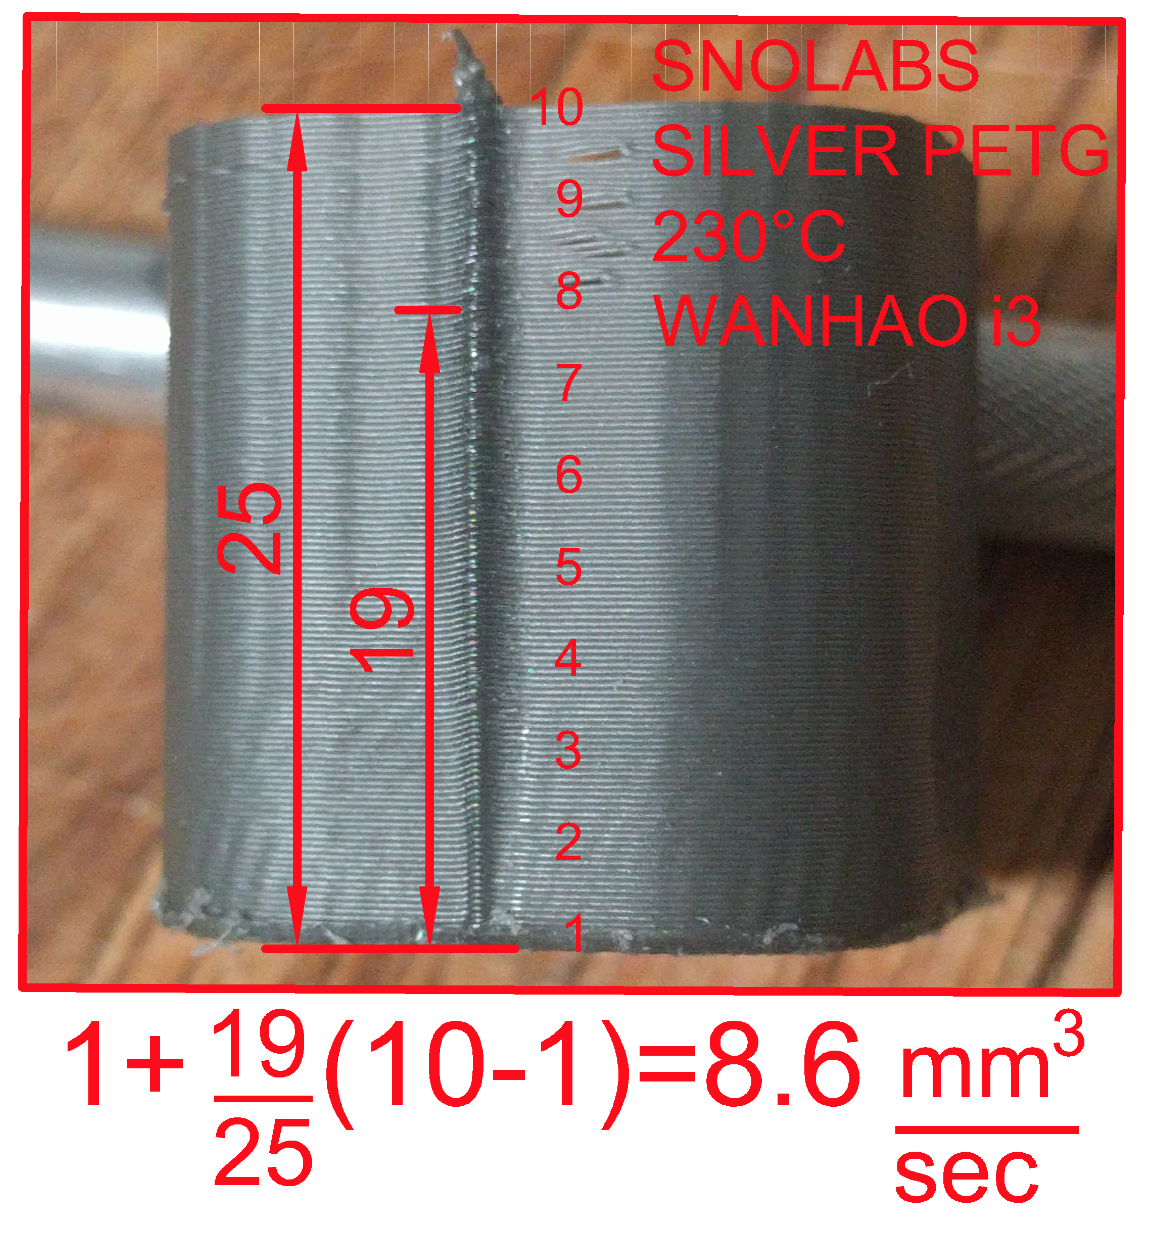
In this example photo, you see random marks around 19 mm from the bottom, thus noting your upper limit for flow at the given temperature. You would put this value of 19 mm into the tuning wizard dialog box, and you get 8.6 mm^3/s.
So what does 8.6 mm^3/s mean?
With a .4 mm nozzle at .2 layers, your upper limit is 106.7 mm/s!
As a general rule you wouldn't want to go below 2 mm^3 unless if you're running small layers at wicked fast speeds.
Next up: The choice is yours, Preload or Linear Advance!
You have two options to let the slicer (Preload) take care of it or do it via your controller board (Linear Advance).
If you are to use linear advance, put the K value under "Matl G-Code" -> "Material G-Code".
Otherwise, let's move onto preload tuning.
From my experience preload is a material setting and doesn't change based on bowden versus direct drive.
For SnoLabs filaments I've done the tuning for you:
- PLA+ use a value of 0.6.
- PETG use a value of 0.4.
- PC+ use a value of 0.5.
For other brands you will have to calculate this value on your own but I will outline the process:
Using the same file, go to the tuning wizard dialog box and shift the drop down menu to PreloadVE Coefficient.
Typically for most runs you will go from 0.0 to 1.0. These values will cover most filaments. However, if you do not get a "rip" line, then increase the limits to 0.5 to 2.
Printing parameters:
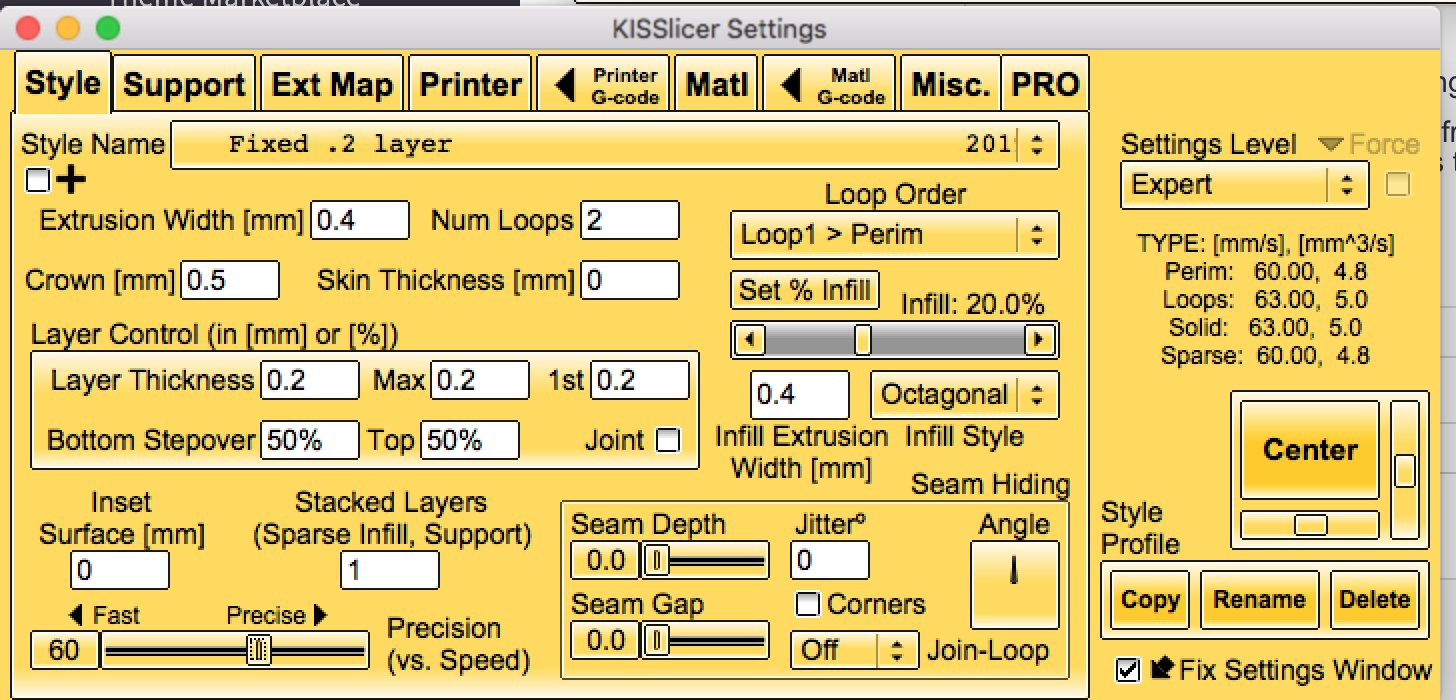
Please note the following:
For speed, set it to somewhere in the middle of your flow rate tune. In this scenario we've chosen 5 mm^3/s.
Retraction is still turned off.
Inspecting the print!
Next up: Retraction (Destring in KISS).
For direct setups, you want this value to be between 0 and 1 mm.
For bowden setups, you have more leeway and this value can be up to 3 mm!
To be continued.


