To everyone reading this, I am open to suggestions on how to set it up properly and where ever possible I will not rewrite, just provide a link to the original post.
Note: this is a work in progress.
Disclaimer: I am not associated with KISSlicer, I just love the software so much that I would like for Jonathan to succeed. It is by far my favorite when it comes to g-code output, however it is a bit difficult to use with the 90s style UI.
DO NOT USE KISS2.0 THERE ARE KNOWN ISSUES.
Please use 1.6.3
We have let Jonathan know and awaiting repairs in KISSlicer 2.0 alpha.
Update: March 2019. We've been using version 1.6.3 for the tuning wizards and then use v 2.0Alpha for slicing.
How to set up KISS?
Michael Hackney has set up a whole video dedicated to set up your printer to get started.
Profile Settings:
Style
This is where your slicing settings take place for a given object.
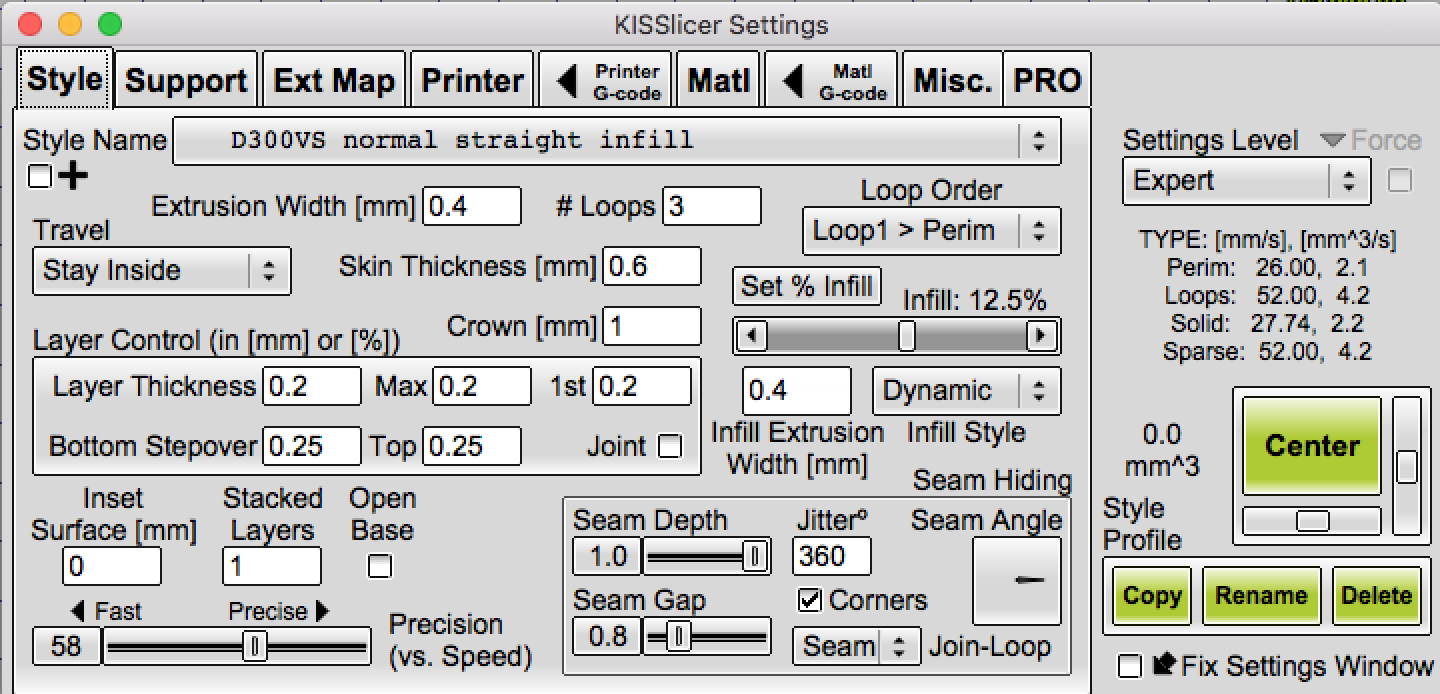
- Extrusion Width [mm]
- Typically same as your nozzle size, 0.4
❆Tip: Can be tweaked larger or smaller to adjust for thin walls and/or features. Should be used in conjunction with the crown feature (see below).
- Typically same as your nozzle size, 0.4
- # Loops aka Perimeters
- Based on your object, and can handle half loops. For example 2.5 would mean every 3rd layer, it'll have 3 perimeters.
- Watch this video: https://youtu.be/C-AtA_DGiBk
- Skin Thickness [mm]
- Typically 3x your first layer size. How thick do you want the top and bottom your part to be?
- Travel
- Simple (This is typically what I use.)
- Stay Inside
- Avoid Edges
- Crown [mm]
- Watch this video:
- Loop Order
- I set this to Loop1 > Perimeter. What this means is that the slicer will print the first loop then go back and print the outer-most layer.
- Set % Infill (or use the slider)
- Pretty straight-forward, how strong do you want the part to be?
- Infill Style
❆Note: Different infill styles will provide different amounts of internal strength to your part, at the expense of increasing printing time. I typically use rounded, but will change it based on the part and perimeters.- Straight
- Octagonal
- Rounded
- Cellular
- Dynamic
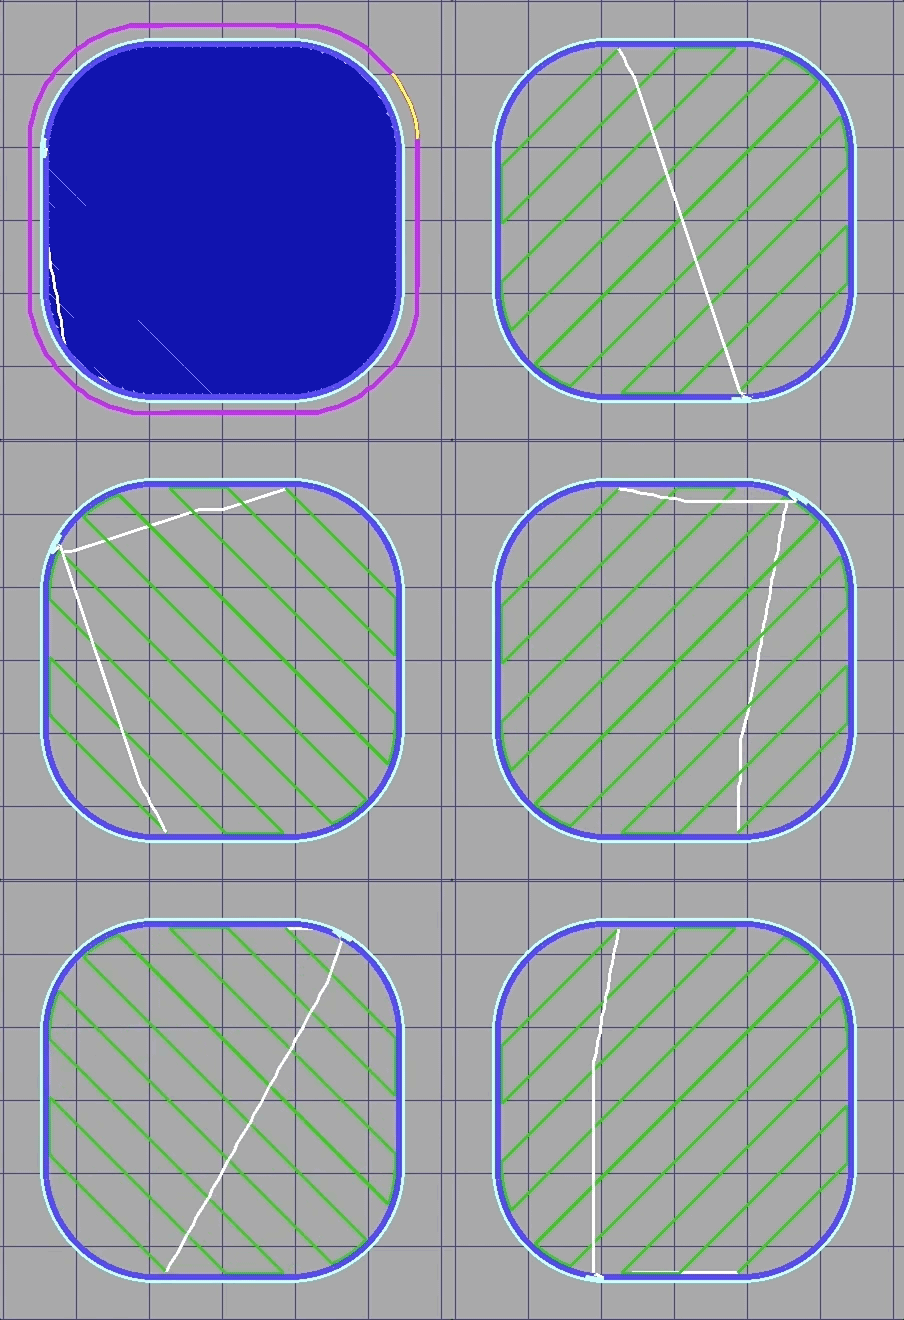
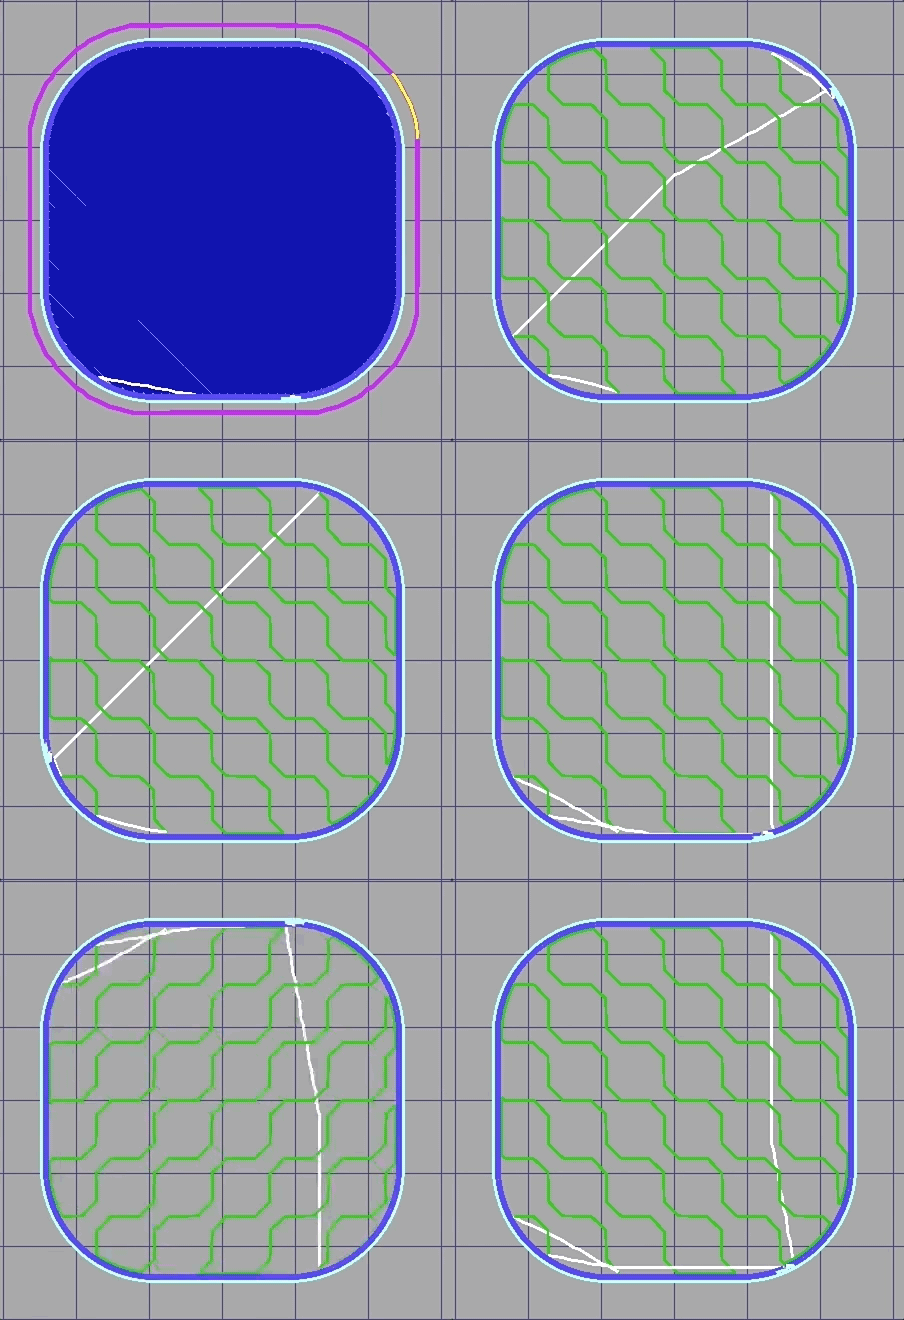
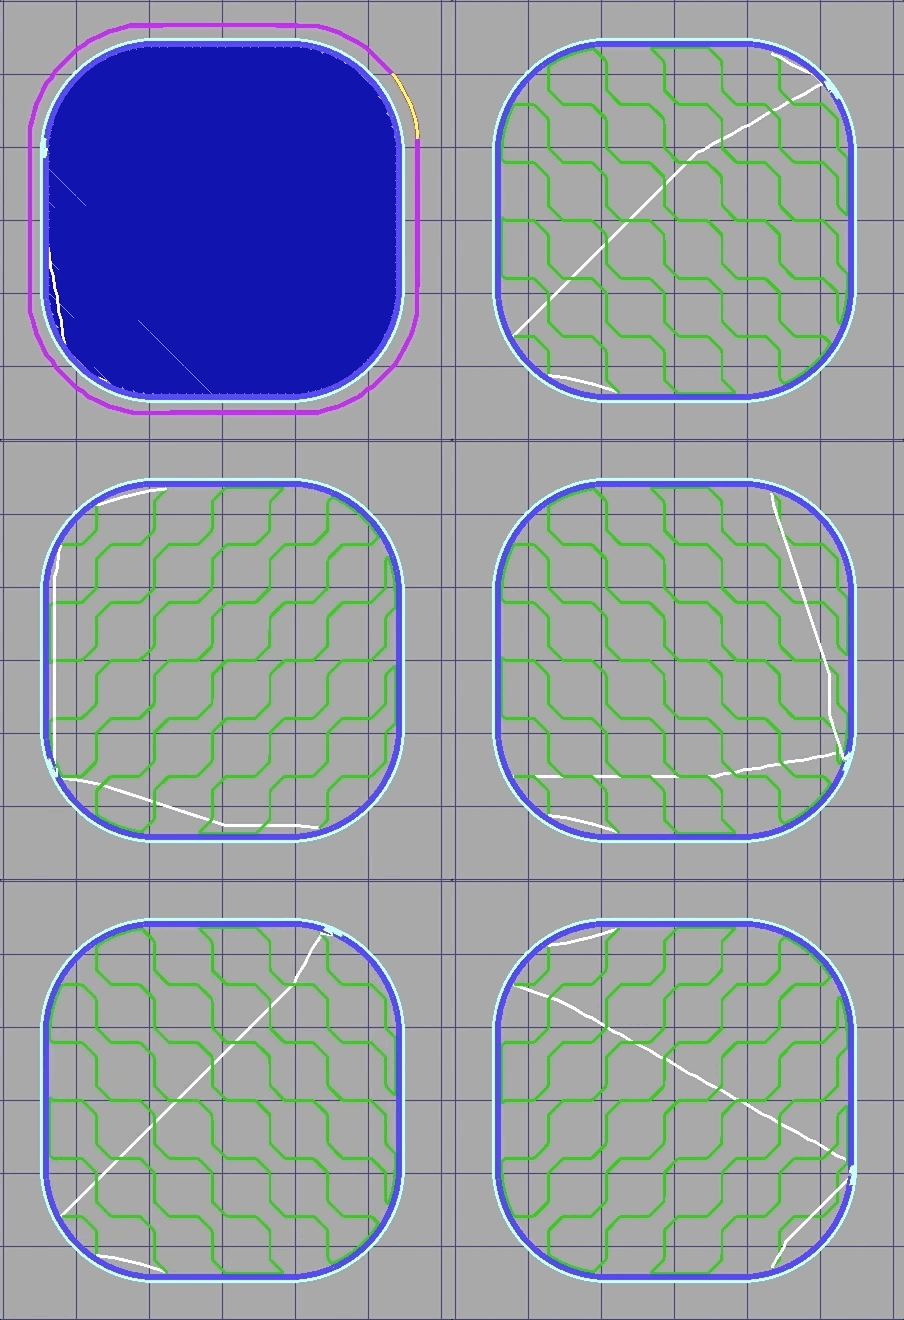
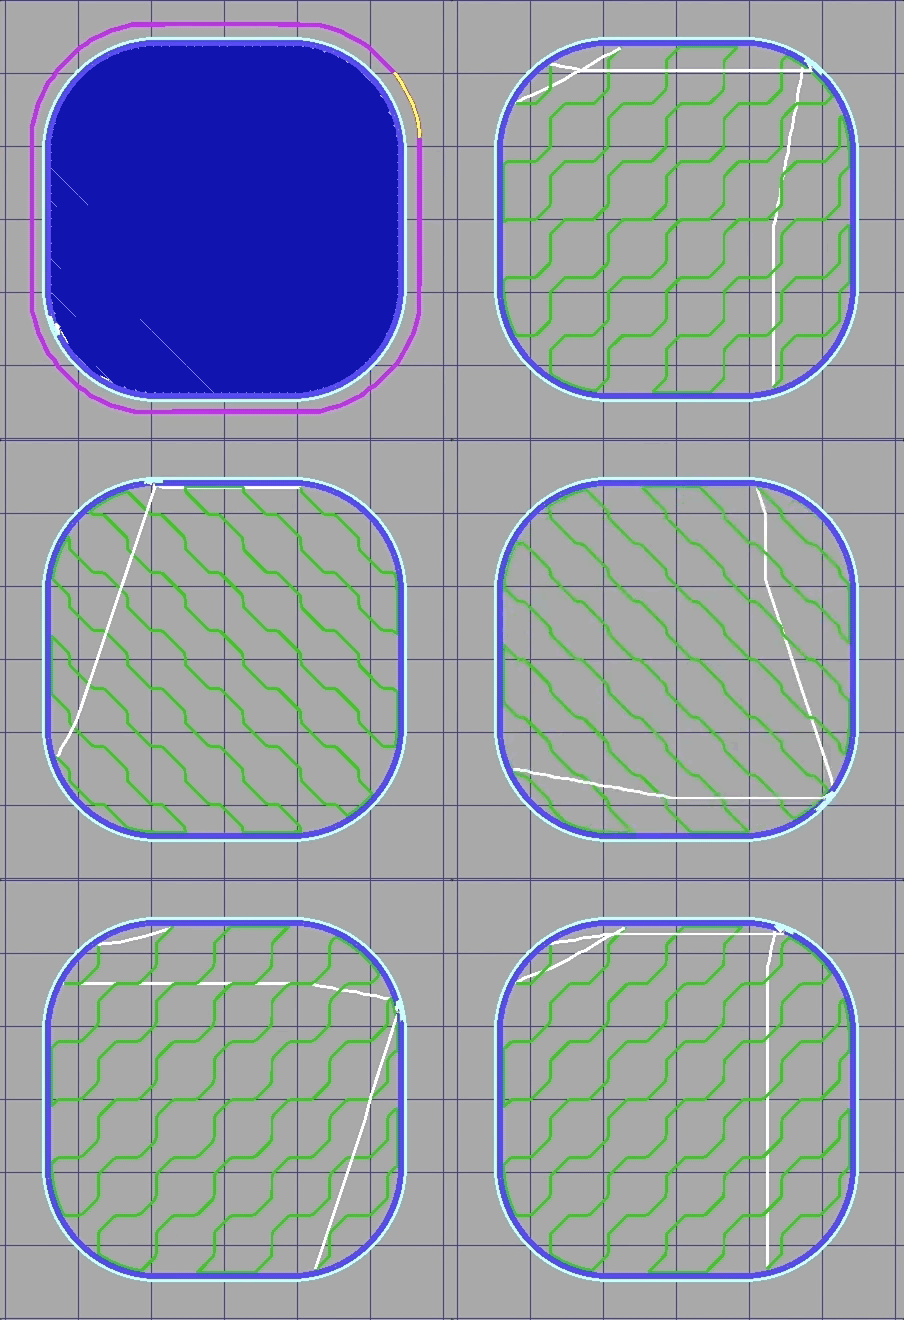
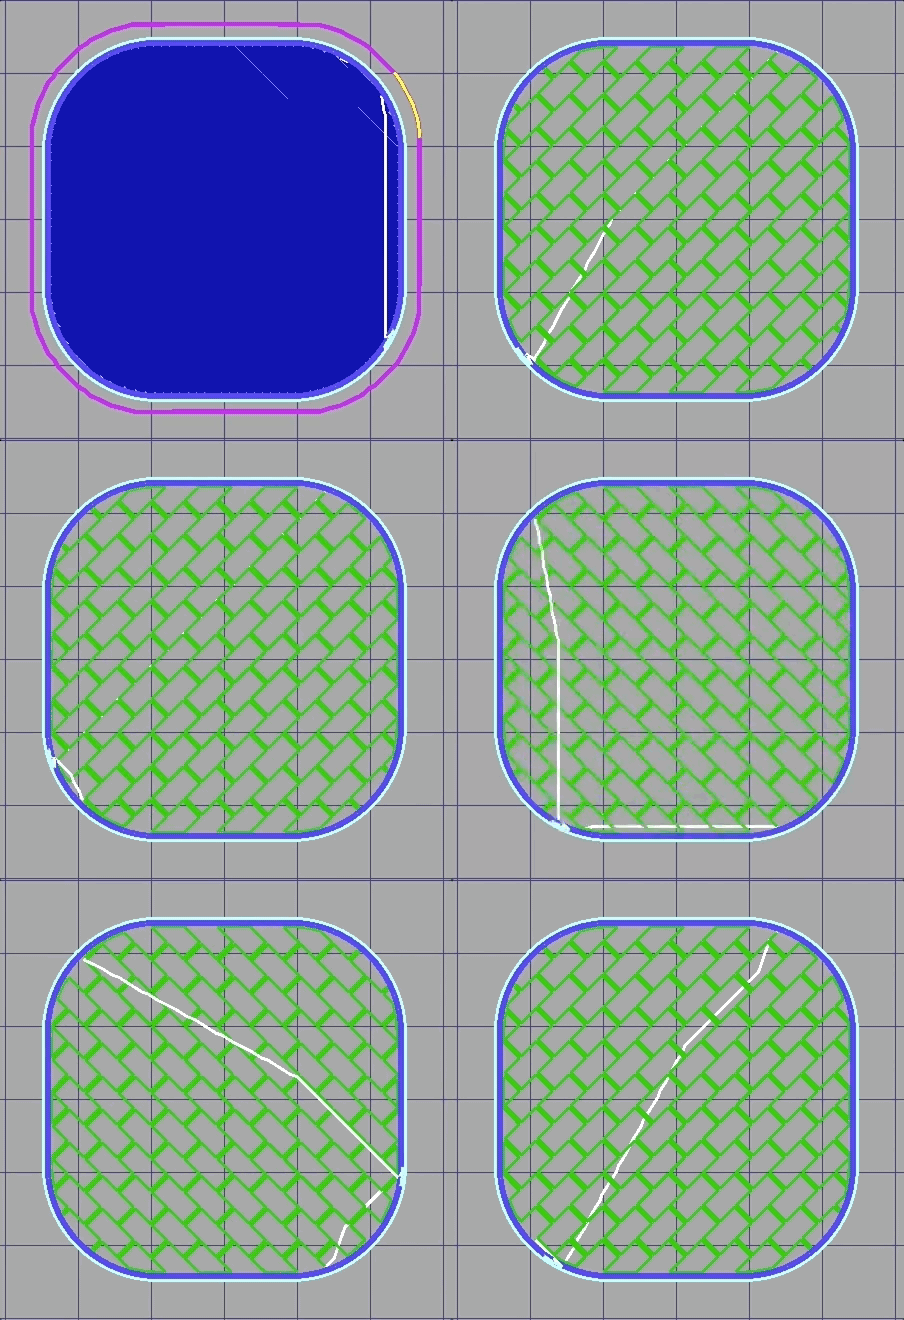
- Infill Extrusion Width [mm]
- Typically same as your nozzle size, 0.4.
- Typically same as your nozzle size, 0.4.
- Layer Control (in [mm] or [%])
- KISS is pretty cool where you can substitute absolute dimensions in mm or relative dimensions in percentage values.
- Kiss allows you to set the nominal layer thickness, 1st layer thickness, and a maximum layer thickness for "adaptive layers" or also known as dynamic layers. By setting the thinnest and thickest layers, KISS will interpolate the best layer heights as it slices the model to get the best surface finish.
EX: Let's say we want to employ this adaptive layers feature with a minimum thickness of 0.1 mm, a maximum of 0.25 mm, and a full first layer height. To do this you would set 0.1, 0.25, 0.2. What this means is that the minimum layer size is set to .1 and the max layer size will be 0.25, while the first layer laid down will be 0.2 mm.
A minimum layer thickness of 0.1 mm is set.
A maximum layer thickness of 0.25 mm is set.
A first layer height of 0.2 mm is set.
The KISS AI will automatically vary the layer height based on your model to get the best surface finish.
EX: For a .2 set layer height, you would set all layer thickness variables to .2.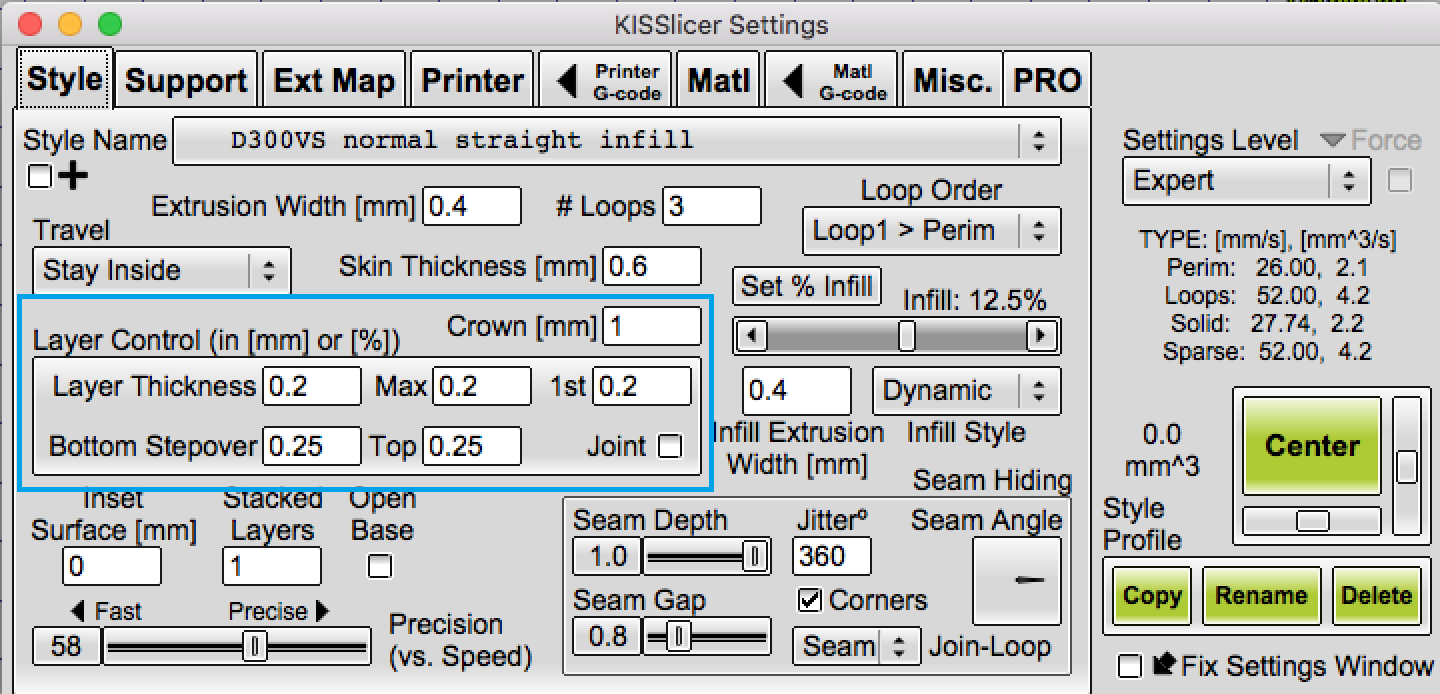
- Layer Thickness (Min)
- Max
- 1st
- Bottom step over
- Bottom (my default is 25%)
- Top (my default is 25%)
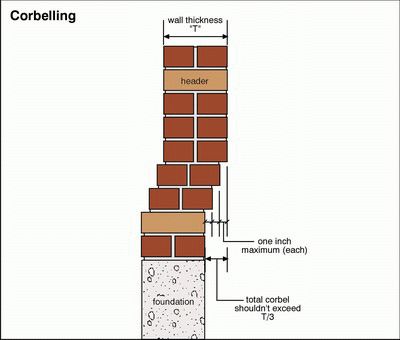
KISS provides a setting to control layer stepover- the stacking of successive layers by how much they can overhang the previous layer. The best way to explain stepover is to look at corbelling in architecture. The image below shows how bricks stack on top of one another but they have a maximum overhang value. The same concept applies with printing plastic.
- Joint (not sure what this does)
- Inset Surface [mm]
- A positive value shrinks all surfaces inwards by the set amount. It can also be useful for printing objects that need to be fit together. A negative value will expand surfaces outwards.
- Stacked Layers
- Used to make support and infill each N layer. If left at 1 (default) it will print support and infill at each layer. If you set it to 2, it will print one infill and support every two layers, making for a faster print. Part strength may suffer a bit.
- Open Base
- I have this unchecked since my parts typically have full bottom layers.
- Speed Slider
- The values are coming in from the Printer->Speed settings. You set a % value by moving the slider and can view the exact speeds under settings level based on type of movement.
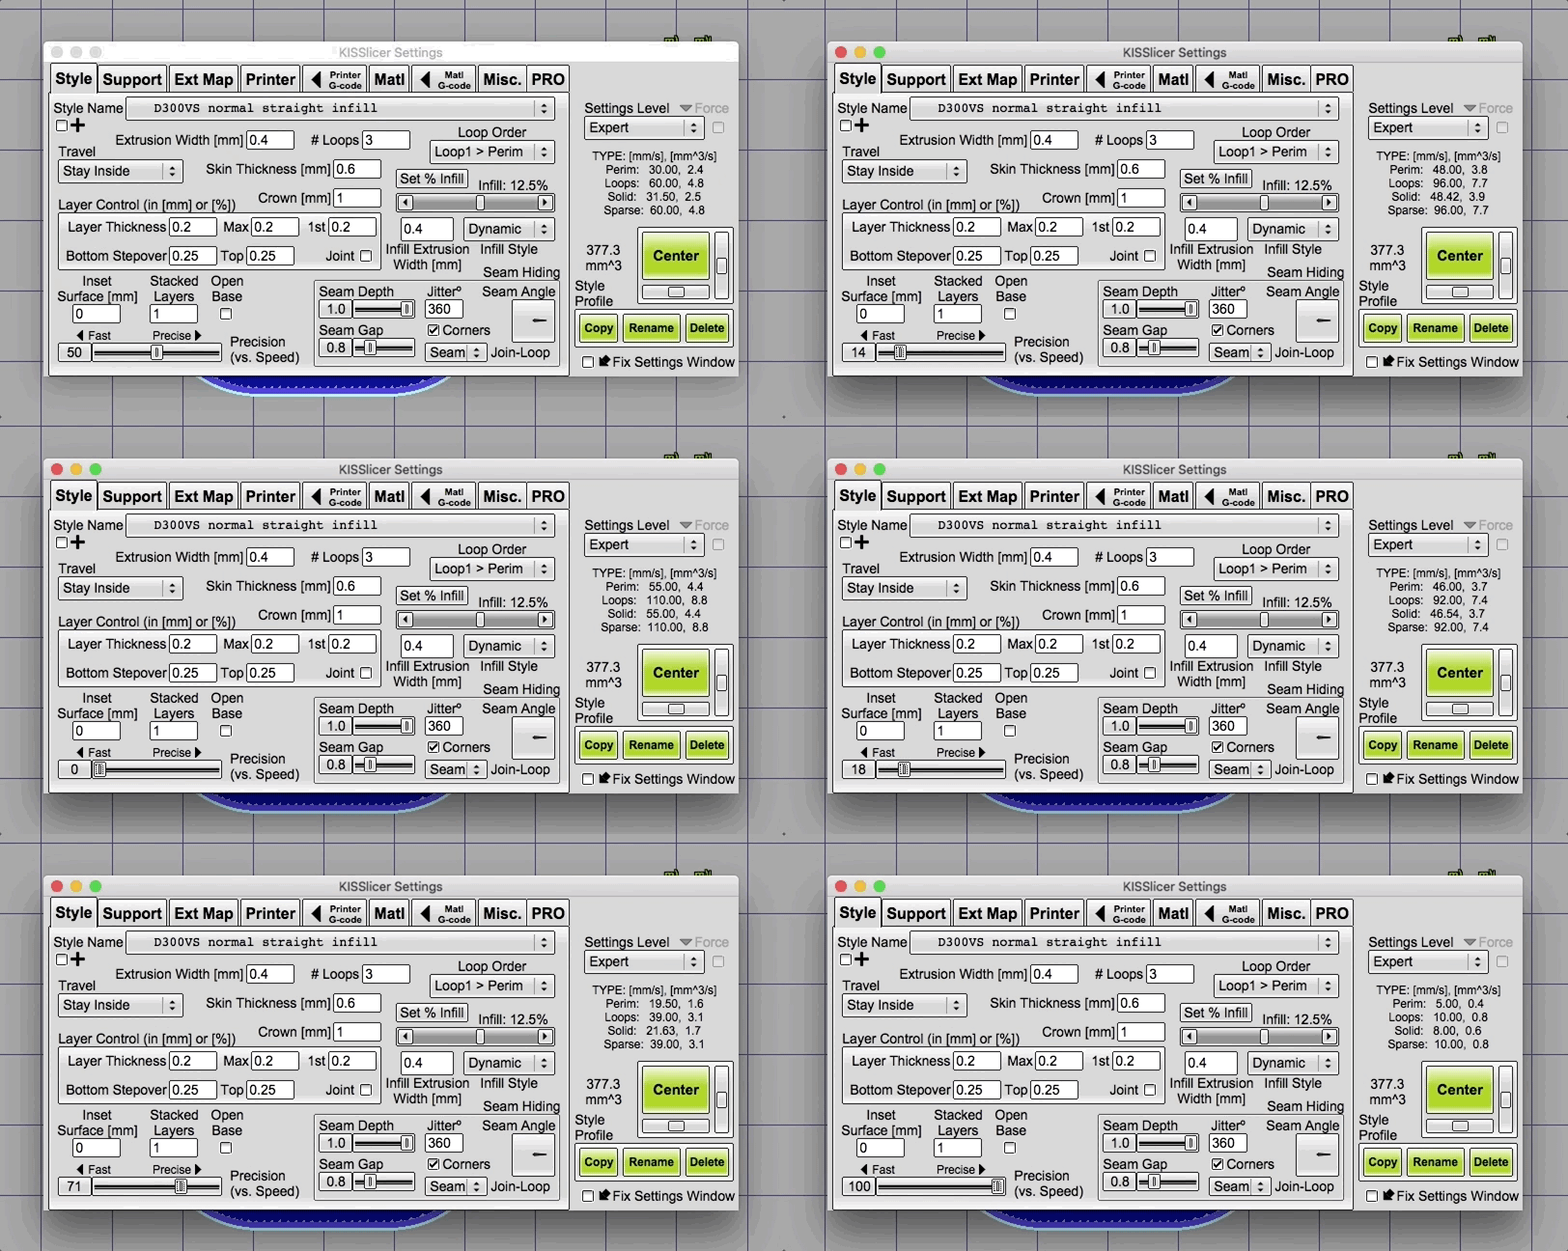
- Seam Hiding
❆Tip: Get rid of those ugly blobs on your prints! These settings will be based on your material. I advise placing an object, slice, and then view the layers by layers.- Seam Depth
❆Tip:Get rid of those ugly blobs on your prints! These settings will be based on your material. I advise placing an object, slice, and then review layer by layer. You will get faster as over time!
- Seam Gap
- Jitter
- Set a degrees to where the slicer can start / stop layers. This in conjunction with the seam angle you may set start/stop layers to a hidden part of your object or towards the back.
- Corners
Will place the seams at a hard corner. This disguises the geometric anomaly at a geometric feature and hides it by making it harder to pick out.
- Seam Angle
Locates the overlap position of the seam like the hands on a clock face. Click the indicator and move it around to change the position.
- Join-Loop
- Off
- Seam (I use seam)
- Full
Support
Pretty straightforward, this is where your support settings will exist.
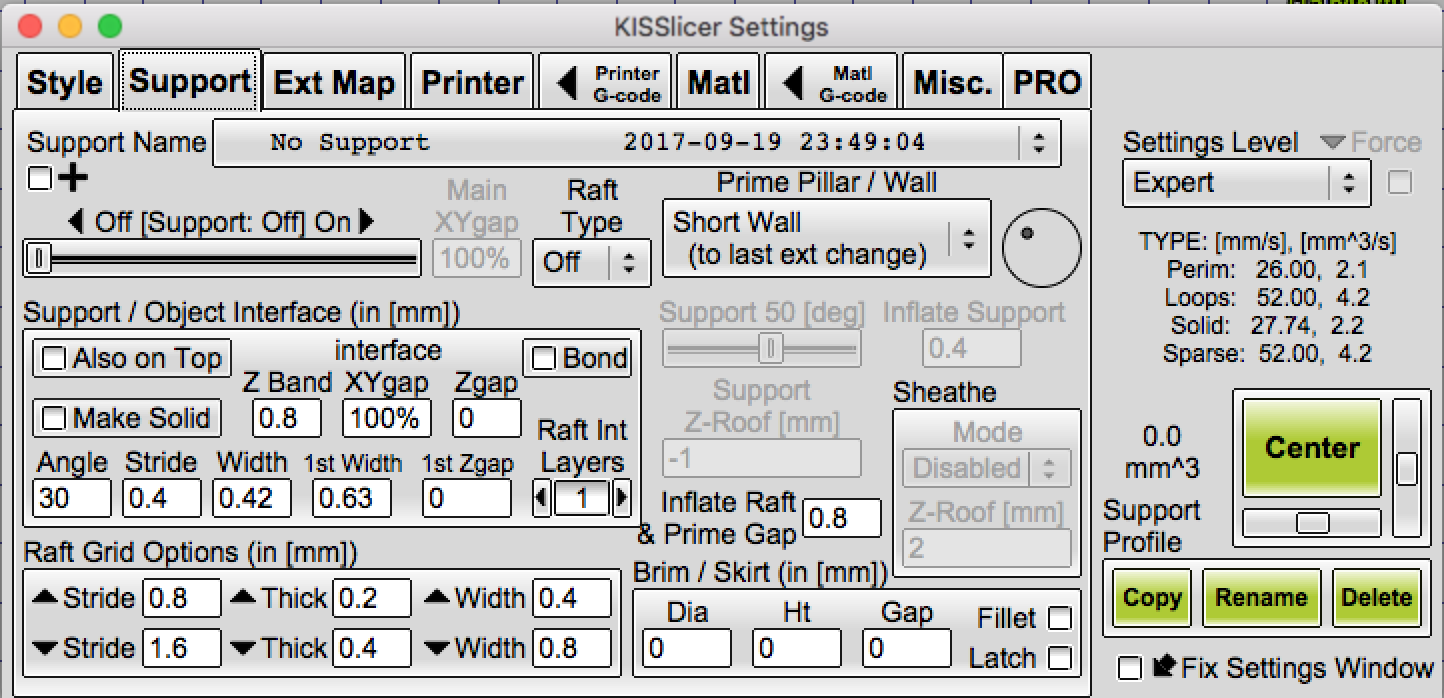
The two most important features here are the support slider and the Z-Gap.
- Support slider
- Typically you want to use the least amount of support to avoid using too much material and getting them off easily. I typically use Coarse or Rough, but to determine this you would have to slice with each setting and then look at the paths view. There are very few instances where you would ever want intermediate or higher. Off: no support geometry will be generated Coarse: very basic parts, with low quality requirements Rough: medium-low supporting density Medium: as the name implies...medium density supporting Dense: increased support density, useful for sphere-like objects Fine: very high support density, print time will increase noticeably Ultra: very high density: for challenging geometries
- Raft Type
- Off
- Grid
- A mesh will be printed between part and print bed. The mesh is printed with the extruder selected in PRINTER->Extruder materials tab. This way, if you have a multi extruder setup, you can use soluble polymer to speed up print cleanup process.
- Pillar
- Same as GRID, but a layer of micro pillars will be added between mesh and print bed. Useful if your soluble polymer is too sticky.
- Support/Object Interface
If you want to get perfectly flat bottom surfaces, enable this option. Keep in mind that with this option double extruder use is mandatory, possibly using soluble support.
- Raft Grid Options
- Stride
- Thick
- Width
- Inflate Raft & Prime Gap
- Brim / Skirt
- Diameter
- Ht
- Gap
- Fillet
- Latch
- Prime Pillar/Wall
Ext Map
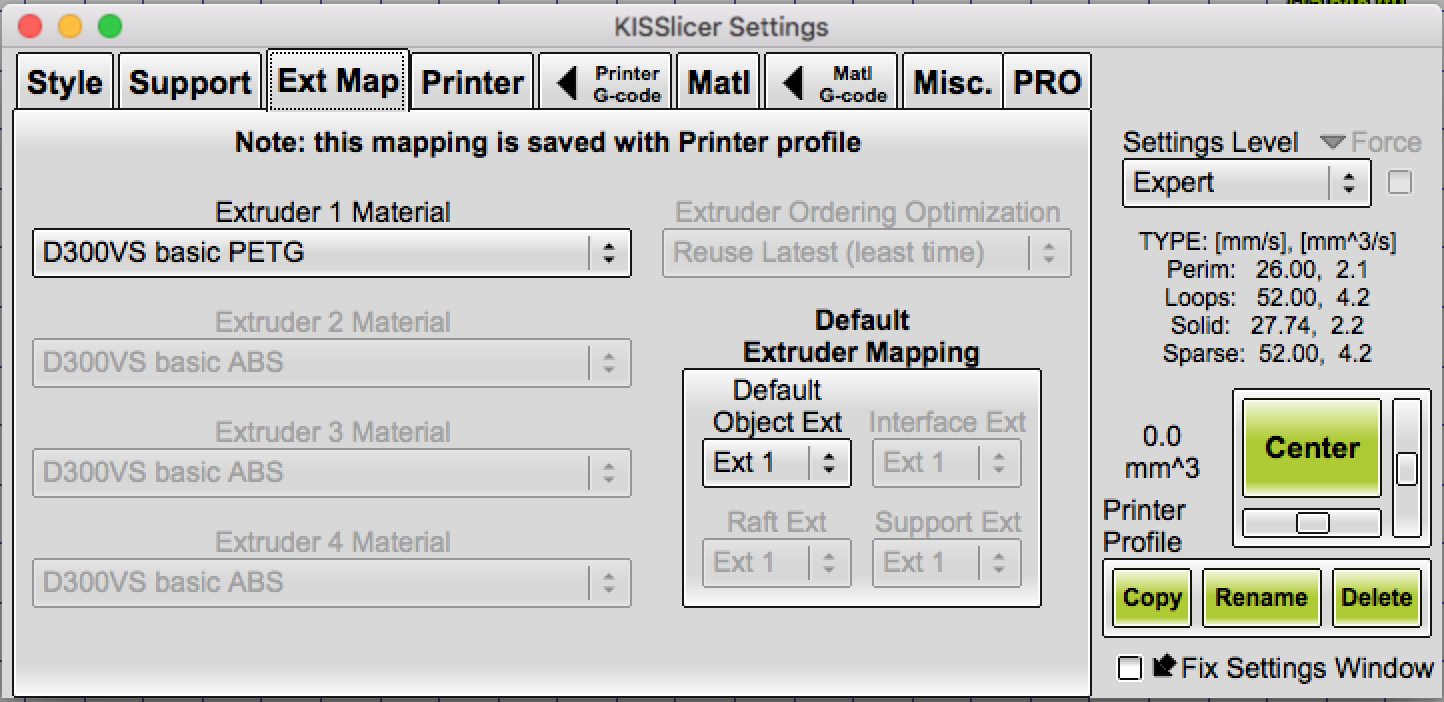
- Map multiple extruders and the material they're using.
- Set the default extruder.
Printer
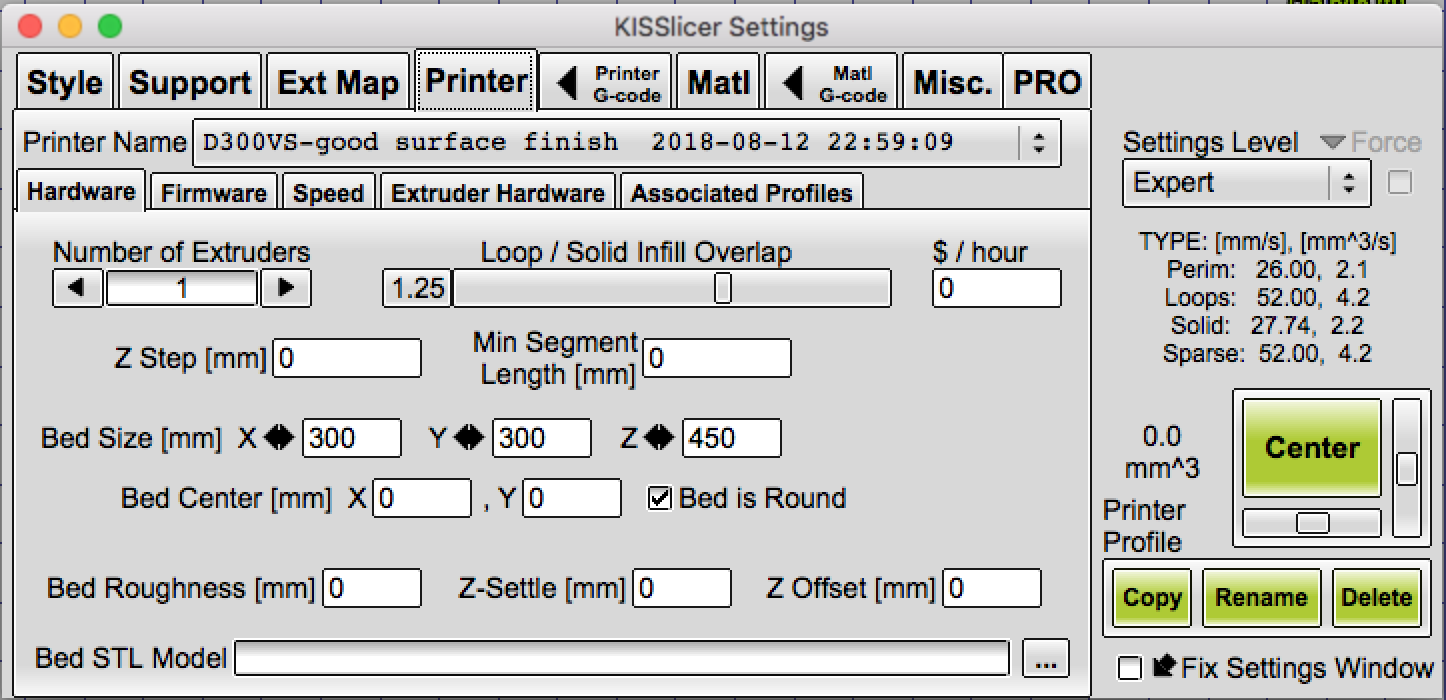
- Hardware
- Set up your printer settings
- Number of extruders
- Loop/Solid Infill Overlap
❆Note: There is a known bug in KISS 2.0 where you have to set it to your [overlap] + 1.0. So I typically use 1.25. - $/hour
- This is used in conjunction with the cost/cm^3 in the material tab. At the end of your slice you will be able to accurately calculate your cost for a given object.
- Z step [mm]
- Note: I set this to 0.
- Min Segment Length [mm]
- Note: I set this to 0.
- Bed Size [mm]
- Set your bed size accordingly.
- Bed Center [mm]
- There is a toggle for deltas (Bed is Round)
- Bed Roughness [mm]
- Note: I set this to 0.
- Z-Settle [mm]
- Note: I set this to 0.
- Z Offset [mm]
- Note: I set this to 0 and configure Z offset via my duet and config.g settings.
- Firmware
- Firmware Type
- Note: this depends on your controller, I use 5D - Relative E.
- File Extension
- For 3D printing you want to set this to "gcode".
- Mark Path Start/Stop
- Note: I set this to "Do not Mark (None)"
- G4 Dwell P is in Seconds
- Note: I unchecked this.
- Include Comments
- I check mark this so that when you open the gcode file in notepad, you can easily read what is going on.
- Fan On
- I set this to "M106", but if you have a different controller you can swap this.
- Fan Off
- I set this to "M107", but if you have a different controller you can swap this.
- Fan can do PWM (e.g. 'M106 Snnn')
- I check mark this since the duet can do PWM.
- Max Nodes / s
- I set this to 0. [Need to see what it's for]
- Post-Process
- If you have a script that you want to run on a sliced file, set that here.
- Firmware Type
- Speed
- Set all of your speeds here
❆Tip: slow down your first layer speeds! Be reasonable with speeds after all you are extruding plastic! - Video:
- Set all of your speeds here
- Extruder Hardware
Note: You want to ensure the extruder is set to- N:1
- This is relevant for multi-extruder setups.
- Ext #
- Axis 1
- Not sure what this is but mine is set to E
- Gain 1
- Not sure what this is but mine is set to 1
- HeatT1
- Click on the arrow and follow the directions to calculate. For me this was 0.0048
- NozDia1
- Straight forward, enter the nozzle diameter here.
- NozLen1
- For the length you will have to look at your nozzle's datasheet. For the nozzles we carry and for E3D 0.4 mm nozzle, this value is 0.6.
- DrvLen
- The drive length is based on the length between extruder and hotend in mm. For direct drive systems I use a value of 50. For bowden style printers you have to include the bowden tube length + the drive length. For example if your tube length is 300 and you're using a E3D v6 (50), the value inputted here would be 350.
- Axis 1
- N:1
- Associated Profiles
- Watch this video:
Printer G-code
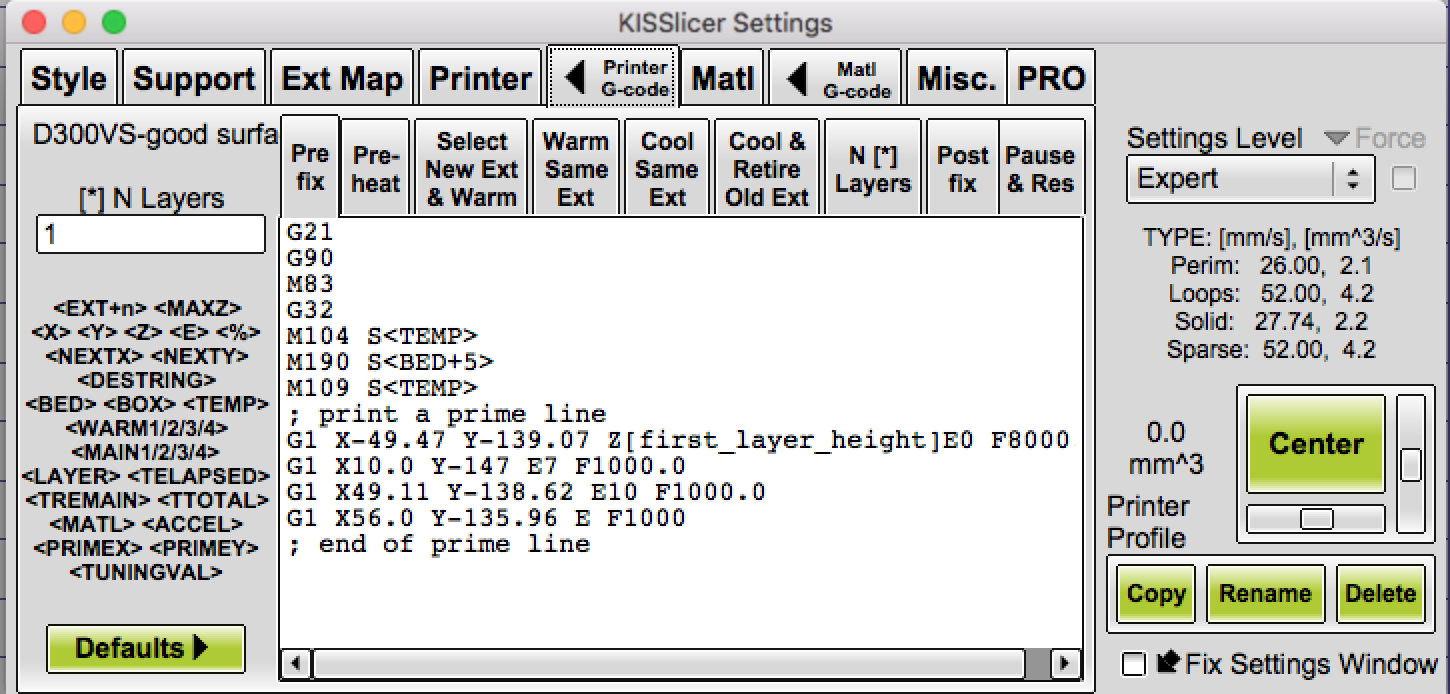
- Pre-fix
- At the start of the print what do you want to do?
- G21 ; Set units to Milimeters
G90 ; Set to Absolute Positioning
M83 ; Set extruder to relative mode
G32 ; Probe Z and calculate Z plane aka AutoCal
M104 S<TEMP> ; Set Extruder Temperature
M190 S<BED+5> ; Set bed temp and wait to reach target temp
M109 S<TEMP> ; in case extruder still isn't to temp set and wait.
; print a prime line
G1 X-49.47 Y-139.07 Z[first_layer_height] E0 F8000.0
G1 X10.0 Y-147 E7 F1000.0
G1 X49.11 Y-138.62 E10 F1000.0
G1 X56.0 Y-135.96 E F1000
; end of prime line
- Pre-heat
- Select New Ext & Warm
- T<EXT+0>
M104 S<TEMP>
- T<EXT+0>
- Warm same Ext
- T<EXT+0>
M104 S<TEMP>
- T<EXT+0>
- Cool Same Ext
- M104 S<TEMP>
- Cool & Retire Old Ext
- M104 S<TEMP>
- N [*] Layers
- Note: this is set in the text box to the left. Maybe you want to increase the hotend temp by 5 degrees every 10 layers? You would set the text box to 10 then type in M104 S<TEMP+5>
- M190 S<BEDTEMP>
M400
- Post fix
- G28 ; home
M104 S0 ; turn off hot end
M140 S0 ; turn off bed
- G28 ; home
- Pause & Res
Matl
Pretty straight forward, this is where your material settings are located.
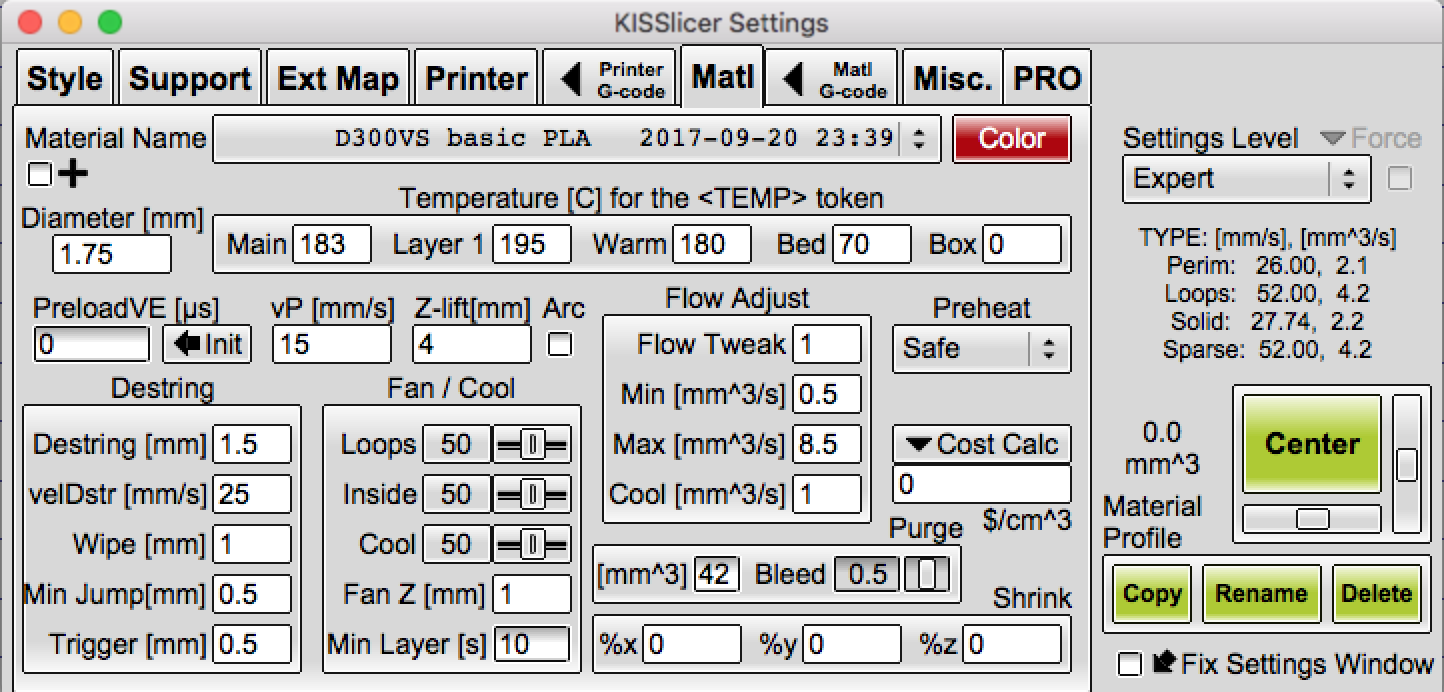
- Diameter [mm]
- 1.75
- Temperature [C] for the <TEMP> token
- Main
- This is your main printing temperature.
- Layer 1
❆Tip: I typically set this 5 degrees hotter than my print temp, so that the material adheres better to your bed substrate. - Warm
- Bed
- Box
- If you have a heated enclosure, you would set your enclosure temp.
- Main
- PreloadVE [us]
- This is a very cool feature that uses the material properties to slice your object better. I recommend using the preload tuning wizard to set this up.
- vP [mm/s]
- How fast do you want the extruder to move for preload functions? I typically use 20.
- Z-life [mm]
- This is material dependent. Essentially depends if your material is Newtonian or non-Newtonian fluidity. Think about it this way: you want the printer to lift to "break" the link, this will be temp + speed dependent.
- Arc
- This is reserved for delta printers, but highly useful because it lessens the z-lift distance. Think about it this way, instead of moving directly up and down, it creates an arc to "break."
- Flow Adjust
- Flow Tweak
- I always set this to 1. It is better to play with the temperature + retraction rather than the flow.
❆Tip: Use the flow tuning wizard to set the Min and Max flow rates for a given material. KISS will automatically adjust your speeds based on this value.
- I always set this to 1. It is better to play with the temperature + retraction rather than the flow.
- Min [mm^3/s]
- Max [mm^3/s]
- Cool [mm^3/s]
- I set this to 1, to use the settings under "Fan / Cool."
- Flow Tweak
- Preheat
- None
- I would use this one if your z probe cannot handle a heat IE SeeMeCNC SE300 requires the hotend temp to be set to 0.
- Safe
- I use this one. This means that the extruder and bed will get to temp before proceeding to start the print.
- Early
- Mid-Path
- None
- Destring aka Retraction
- Destring [mm]
- Set the retraction length.
- velDstr [mm/s]
- How fast to retract? I use 20.
- Wipe [mm]
- How far do you want the hotend to move back before starting a new print. Essentially backtrack before starting a new layer.
- Min Jump [mm]
- Trigger [mm]
- Destring [mm]
- Fan/Cool
- ❆Tip: More cooling is not always better! Too much air will cause stringing!
- Loops
- Inside
- Cool
- Fan Z [mm]
- Min Layer [s]
- When do you want cooling to start? I typically want to start it around layer 10.
- [mm^3]
- Bleed
- Shrinkage %
- X, Y, Z
- I haven't personally used this but it would be used for materials that shrink, ie nylons.
- X, Y, Z
- Cost Calc
- How much does a given material cost per gram? It's used to give a cost per g at the end of slicing.
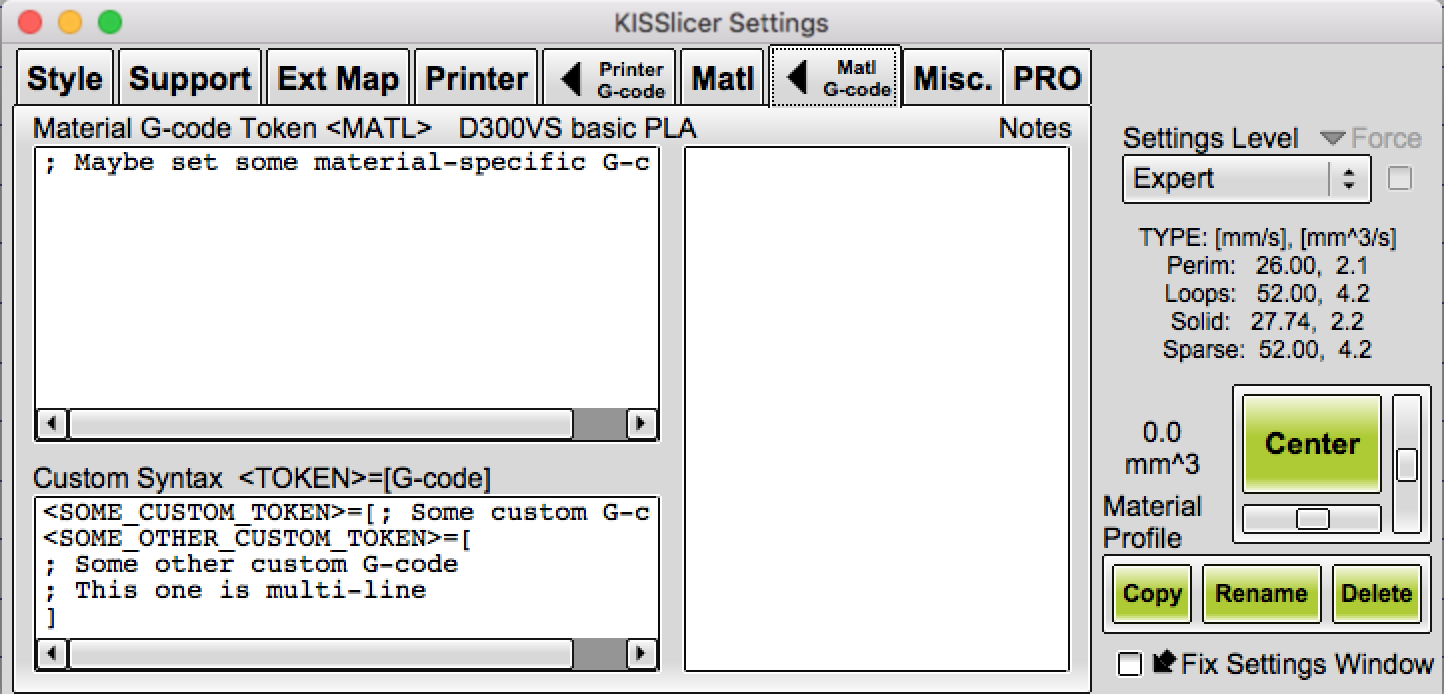
<Matl G-code
- If you have material specific g-code you want to set, that would be here. I do not use this feature.
Misc.
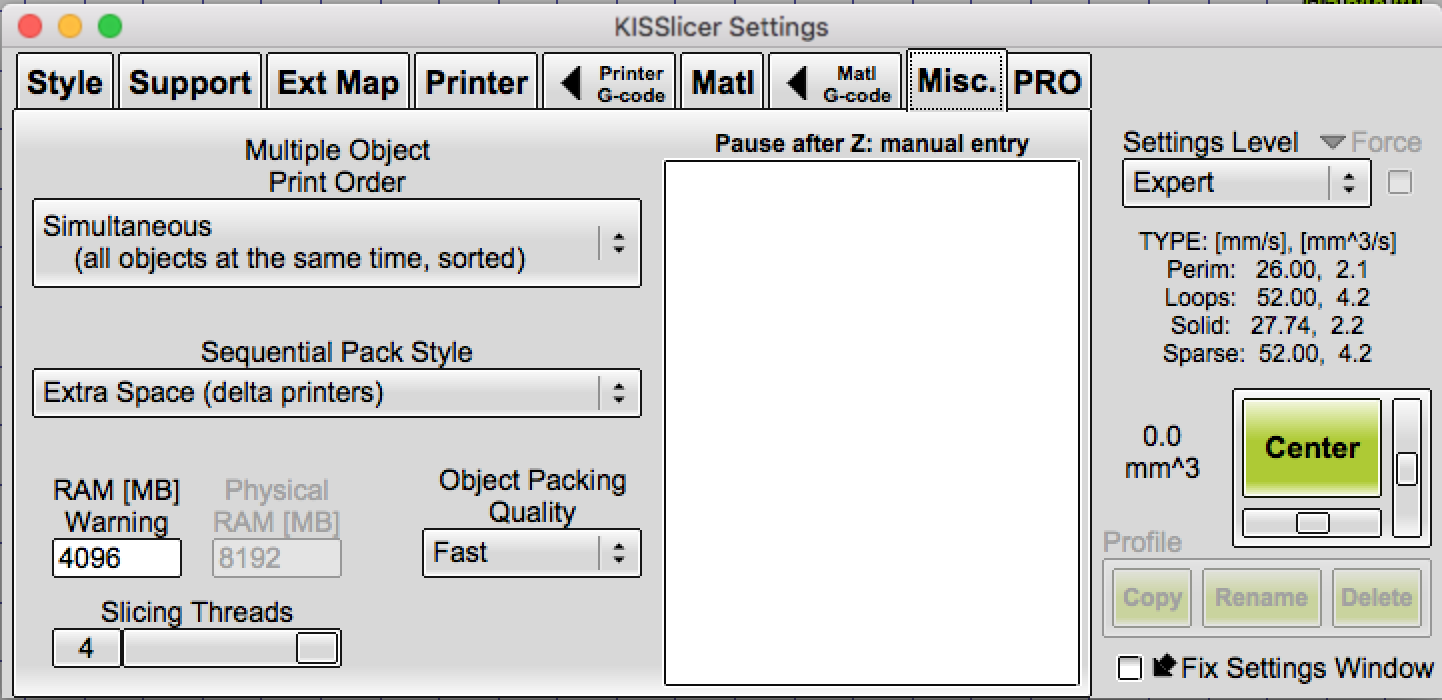
- Multiple Object Print Order
- I set this to simultaneous mode, so that all of the objects print at the same time.
- Sequential Pack Order
- How do you want to pack multiple objects on to the build plate?
- Cartesian or delta style.
- RAM [mb] Warning
- How much ram can you dedicate to the slice?
- Object Packing Quality
- Fast
- Balanced
- Precise
- Slicing Threads
- How many cores do you want to set towards KISS?
Pro
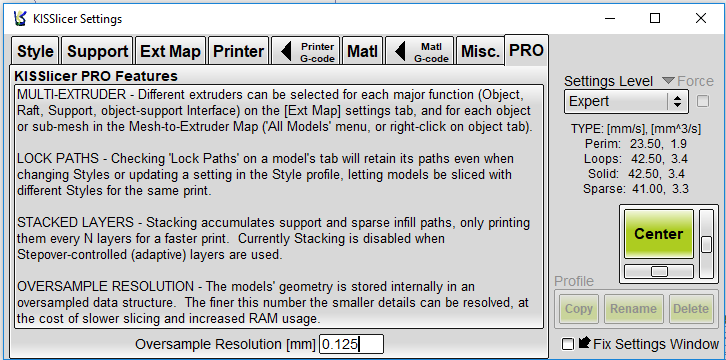
- Oversample Resolution [mm]
Tuning Wizards
These are located under the top bar under the wizards menu. If you are using a tuning wizard, KISS will turn into an ugly yellow color to note that you are in tuning mode.
For Temperature, Flow Rate, and Preload tuning, use this file.
- None
- Be sure to switch back to none when you are done tuning. KISS will return to it's normal color.
- Temperature [C]
- The optimal print settings are written on the right. Typically you would use the manufacturer's Min to Max values. Once you are done with the print and using a set of calipers place in the best Z value in mm to get the best Temperature value. For SnoLabs filaments, I typically write what temperatures I use in the specific product pages. You are looking for the strongest inter-layer bonding.
- Video:
- Flow Rate [mm^3/s]
- Read the description on the right side to determine the best flow rate for a given material. What this tuning will tell you is how fast you should print with a given material.
- PreloadVE Coefficient [us]
- Read the description on the right and you are looking for where the seams are best. I will post pictures on this. If you message me, I will provide the Preload Values that I use however it is best for you to do it if you have different extruders/hotends. Typically this test is done 3 times. First off 0-6. Second is based on your print select two Z values with your calipers, so this may be 0 and 2. Third test is for a finer tune, maybe this will be .5 and 1.5.
Note: Go to the Matl tab and ensure destring and preload are set to 0.
- Read the description on the right and you are looking for where the seams are best. I will post pictures on this. If you message me, I will provide the Preload Values that I use however it is best for you to do it if you have different extruders/hotends. Typically this test is done 3 times. First off 0-6. Second is based on your print select two Z values with your calipers, so this may be 0 and 2. Third test is for a finer tune, maybe this will be .5 and 1.5.
- Destring Length [mm]
- Read the description on the right and you're looking for where there aren't any strings present. I wouldn't do 0-10, because those values are absurd! I typically would use .5 and 2.5 for direct drive and larger values for bowden style printers.
Note: Go to the Matl tab and ensure retraction is off! - **For this tune, use this file.** This tune requires 4 pillars to run accurately.
- Read the description on the right and you're looking for where there aren't any strings present. I wouldn't do 0-10, because those values are absurd! I typically would use .5 and 2.5 for direct drive and larger values for bowden style printers.
- <TUNINGVAL> G-code token only
- Not sure what this is, as I have never used this.
